My
first fursuit project 2 |
|||||
 Here I have cut out a piece of white fur that I shaped around the lower jaw. I have sewn a piece of black satin on each side of it, and this will go inside the mouth. |
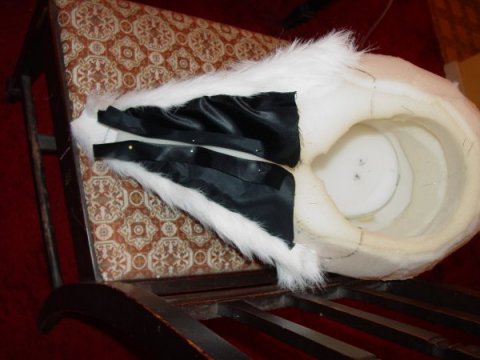 I now have the fur around the jaw with the fur inside the mouth and the satin underneath. I then pinned it to size and removed it. |
 Here is the satin sewn down the middle. |
|||
 And the fur at the end is tucked in and sewn to the satin to hold it. |
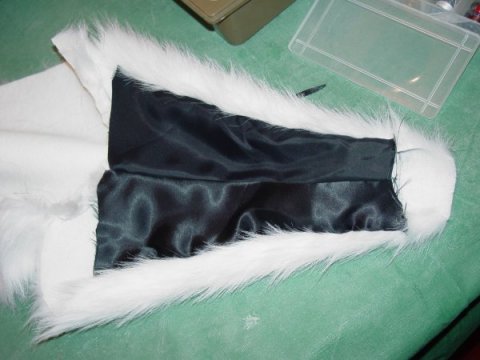
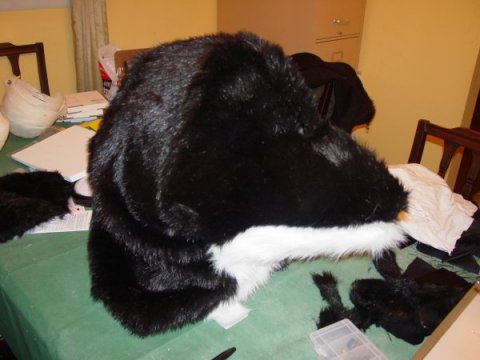
 Here is the white fur part on the lower jaw of the head. |
 I then laid a piece of black fur over the head and cut it to the shape of the jaw and the face, ending around where the ears would be. |
|||
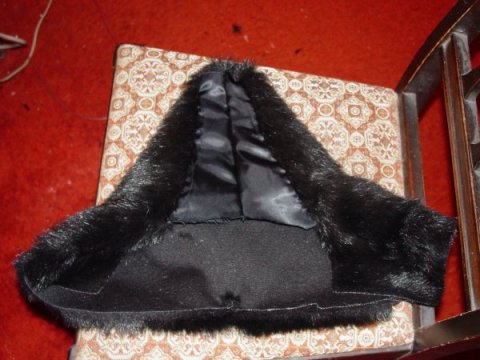 I then repeated the same procedure with the black satin on the upper jaw. |
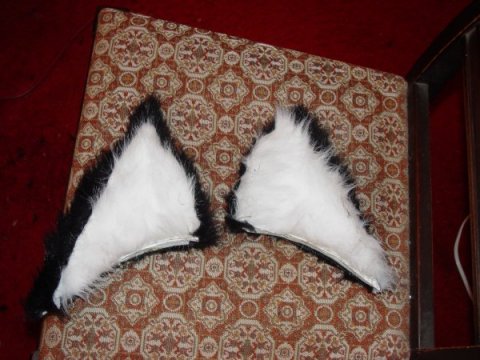 Fur was then laid out over the ears inside out and pinned. Then it was sewn up and turned right-side in. The fur was glued at the bottom edge to hold it on. |
 Here are the ears sitting on top of the head to test the fit. |
|||
 Next I cut another piece of black fur to fit on the back of the head. This was pure trial and error, I just kept tucking it in and pinning and sewing. Here you can see the massive puckers on the side which I cut out and sewed shut. Fur is neat to work with in that when brushed out, the seams barely show! |
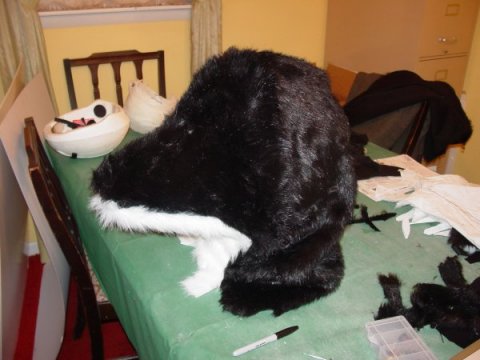 The back piece installed. This looks to be either a mole or a furry orca! |
 Adding the ears on does help! To hold the ears, I took two pieces of the stainless steel welding rod and bent them into a squared off "C" shape, then I sharpened the ends and just shoved them through the foam and then into the ears. The ears can be easily removed for packing and then put back on. |
|||
 A side view of the ears. |
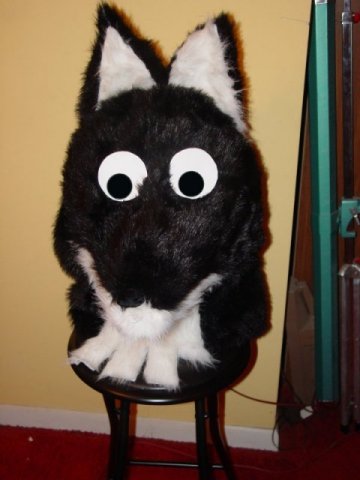 Here is just a goofy picture. I cut some eyes out of paper and stuck them on just to see how it would look. |
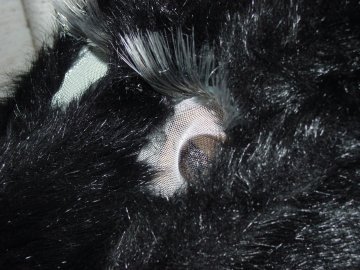
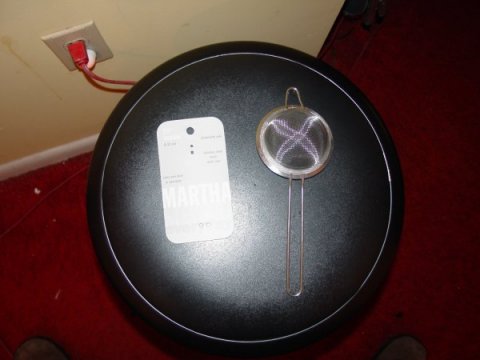 To make the eyes for real, I started out with two "Martha Stewart" 2.5 inch kitchen strainers from K-mart. |
|||
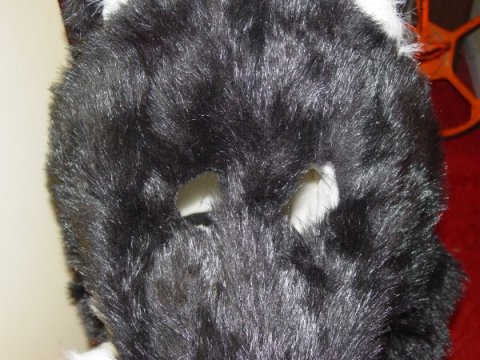 The eye holes in the fur were enlarged to fit these and I secured the fur between the eyes by sewing black thread through the fur and foam, and then to the black satin on the upper jaw. This kept the fur on the face from flopping around and also kept the satin up for better breathing. |
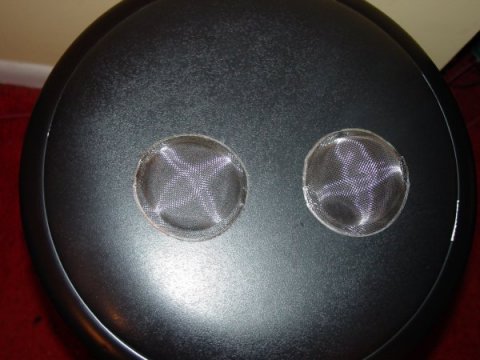 Using a grinder (a dremel tool will do), I cut away the frame around the strainers until only mesh was left. |
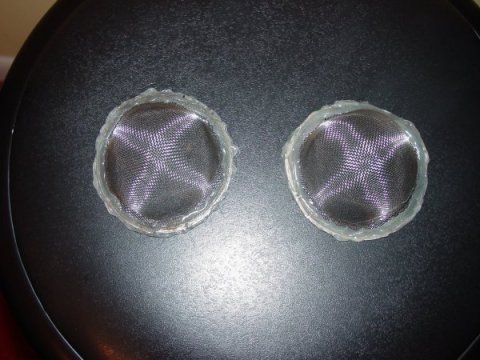 I then applied hot glue all around the edge so there were no sharp pokey wires. I then spray painted the inside white, and then using a piece of paper with a hole in the center, sprayed the black pupils. Then I pushed the center of the bowls inward. |
|||
 Here are the strainers installed into the eyes. The fur around the edges of the eyes was hot glued down to the screening. |
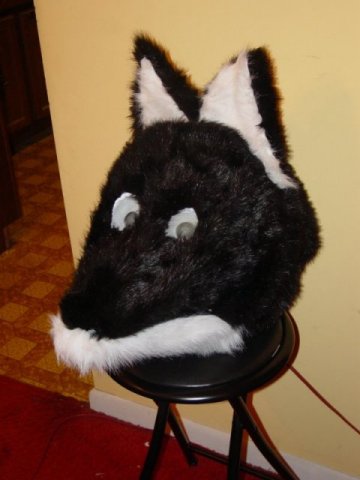 Constructing eyes this way gives them that "following you" quality. The raised centers in the bowls appear to float over the whites and appear at the edges of the eye openings when seen from different angles. |
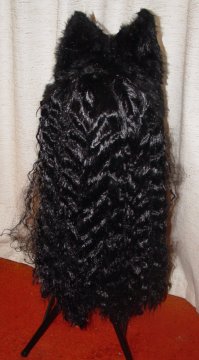 And here is a view of the back of her head after I added hair. I used two long black slightly curly wigs, one on each side, and just safety pinned them on. |
|||
 Here is a close up of the eyes after I added some long eyelashes to her. I will get some pictures on line showing how I did this. They were made from a paint-brush, and hot glue. |
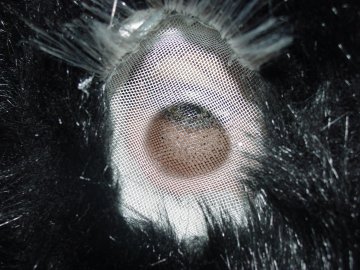 A head-on view of an eye showing the pupil "looking right at you". This picture was taken after Anthrocon and you can see that this lash has started to loosen a little bit, more hot glue needed! |
Next, constructing the body! | |||